Official Luthiers Forum!
http://www-.luthiersforum.com/forum/

Bindings Complete - Progress Pics
http://www-.luthiersforum.com/forum/viewtopic.php?f=10102&t=10034
Page 1 of 1

Author:  dmills [ Wed Dec 27, 2006 2:47 pm ]
Post subject: 

Found a bit of time during the holidays to glue up the sound box and install the bindings (Myrtle b&s with Walnut bindings). I ended up with a couple small gaps at the tight bends at the waist and upper bout but they disappeared with a little glue and sanding dust. Do many of you use clamping cauls in this area when installing the bindings? Given the soreness of my thumbs the next morning, I don’t think I would be able to increase the taping pressure next time.

Well, its time to pull up anchor and sail into the next uncharted sea – The Neck.

Hope everyone is having a great holiday.


Author:  peterm [ Wed Dec 27, 2006 2:50 pm ]
Post subject: 

Way to go!! Looks great!!
Nice Myrtle....

Author:  Brad Way [ Wed Dec 27, 2006 2:53 pm ]
Post subject: 

Very nice job!

Author:  old man [ Wed Dec 27, 2006 3:03 pm ]
Post subject: 

Good job and outstanding wood. I love that myrtle. Nice combo.

Ron

Author:  Serge Poirier [ Wed Dec 27, 2006 3:59 pm ]
Post subject: 

Awesome wood, looks really nice so far Doug

Author:  Alain Desforges [ Wed Dec 27, 2006 11:58 pm ]
Post subject: 

Great looking work!

Author:  Sam Price [ Thu Dec 28, 2006 1:00 am ]
Post subject: 

mmmmmmm....m-m-myrtle...*drools*

Nice, clean work!!!

Author:  Cocephus [ Thu Dec 28, 2006 1:02 am ]
Post subject: 

Nice work, Doug.
Sore thumbs and fingers just seem to go with the territory, don`t they?
Coe

Author:  John Lewis [ Thu Dec 28, 2006 1:20 am ]
Post subject: 

Doug-

That is so pretty! I love the way all the woods work together - it's simple and understated. I love the look of myrtle with the walnut bindings, the burl trim and the bearclaw top. Just awesome - I can't wait to see this with the neck and finish on it.

Author:  Chris Cordle [ Thu Dec 28, 2006 1:32 am ]
Post subject: 

Doug,
Your guitar looks fantastic! I've been having the urge to try some myrtle
myself. Wonder how it would sound with a redwood top?

Anyway, here's a trick I tried in the waist while putting binding on the top.
I had a heck of a time with the back so I tried this and it worked really
well.
(NOTE: the rubber block on the left is the only one actually doing the
work. The right side was already done at this point and I used the same
method).


I think next time what I'm going to try is to make some blocks that fit the
contour of the waist, attach sandpaper to the contact side of the block
and clamp it in there much like I did with the hard rubber sanding blocks.

Author:  rich altieri [ Thu Dec 28, 2006 2:45 am ]
Post subject: 

I have had that problem in the past as well. I like Chris' approach which is simple.

In my case, I bought some of fabric webbing material at a fabrics store which solved my problem, not only at the waist area but closing those small gaps all around. Think I picked this approach up from Robbie O'Brian DVD. Tried to find a picture but dont have. I can shoot one if you need.


Author:  L. Presnall [ Thu Dec 28, 2006 3:06 am ]
Post subject: 

Wish my first bindings looked that nice!

Author:  paul harrell [ Thu Dec 28, 2006 11:26 am ]
Post subject: 

I always do a dry run to see if there any places that take a lot of pressure to pull up tight. If I find a place, usually in the waist or the upper bout, I steam that area of the binding using an iron and a damp cloth. I do this while the binding is on the guitar and as soon as I steam it I put a couple of pieces of tape over the area to pull it up tight and when it cools it fits much better and I don't have any problem with the glue up.

                               Paul

Author:  Don Williams [ Thu Dec 28, 2006 11:42 am ]
Post subject: 

That looks really sweet!

Author:  Rod True [ Thu Dec 28, 2006 12:36 pm ]
Post subject: 

First off that looks great from here.

Second, on to the bindings.

If the bindings are shaped right, you really don't need that much pressure to hold them in place, so either there is to much spring back when pulling the bindings out of the bender or you haven't bent them enough on the pipe. Get the binding shape right and you won't have sore thumbs.

(Hey did I sound like Mario there? [BG])

I'm really cheap and I usually only use standard masking tape, one strip for binding and like I said as long as the binding is the right shape, even this inexpensive masking tape will do the job well.

No offense Chris, but that method of sucking the bindings in scares the you know what out of me. One 1/8 of a turn to much, just to get the binding in there and *pop* something can happen.

Author:  dmills [ Thu Dec 28, 2006 1:45 pm ]
Post subject: 

Thanks for the comments and suggestions. You are correct about the bindings Rod. They came out of the bender with some spring back at the waist area and I don’t have a hot pipe to persuade them into the exact shape. A rubber faced caul the same profile as the waist used with a good amount of caution seems tempting though. Since you would have constant visual feedback of the glue joint, you could slowly squeeze just until the gaps close. In fact the “tools and jigs” section on the site links to “Berna Hobby Clamps (Great for clamping your bindings at the waist)”.    Your caution regarding the danger of over clamping is a valid one however. The other obvious solution as mentioned is to buy/build a hot pipe and solve the problem at the source. Has anyone else used clamping cauls with success or disaster?dmills39079.907025463

Author:  gozierdt [ Wed Jan 03, 2007 3:11 am ]
Post subject: 

Doug,

Great Job 
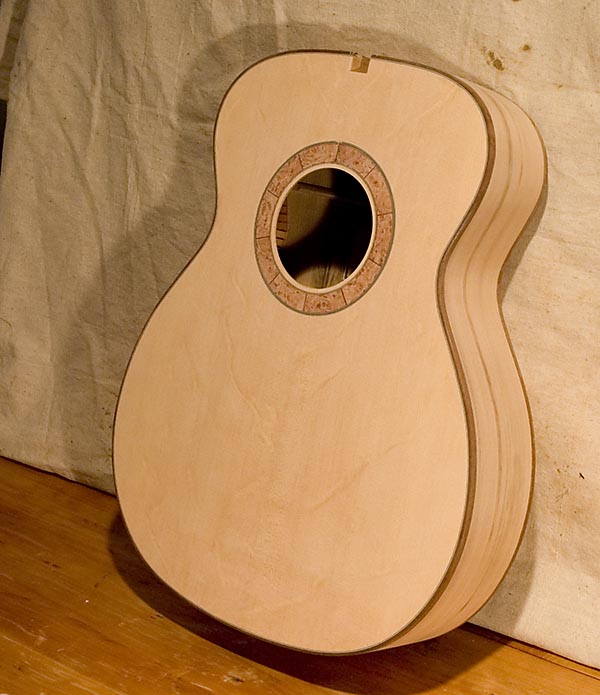
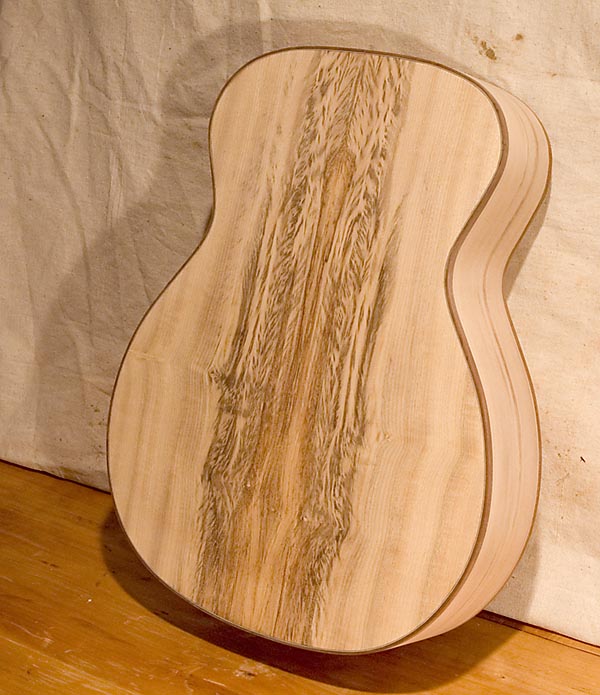
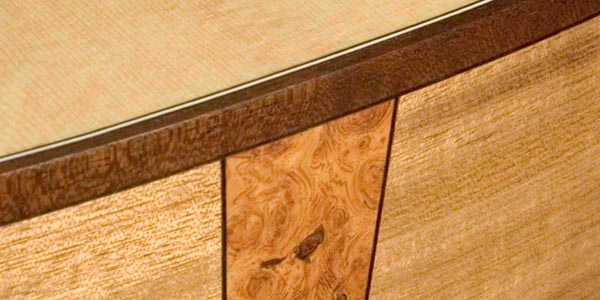
! What burl are you using for your back graft and rosette? The Myrtle and bearclaw top are first class. Send us more pictures as you move onto the neck.

Page 1 of 1 All times are UTC - 5 hours
Powered by phpBB® Forum Software © phpBB Group
http://www.phpbb.com/